

TL;DR: Turning your blog into a book is a smart way to build authority and earn extra income using content you already have. This guide shows you how to organize your posts, refine your manuscript, and publish it as an eBook, audiobook, or physical book.
Why Turn Your Blog Into a Book?
You can turn your blog into a book to create a powerful asset that works for you in ways a website alone can’t. Your existing content already demonstrates your knowledge, so transforming it into a book simply packages that expertise in a new format. Here are the key benefits of transforming your blog content into a book:- Build authority and credibility — Publishing a book positions you as an expert in your niche. This makes it easier to attract clients, partnerships, and media attention.
- Reach a broader audience — Some people prefer reading books over blog posts. Having your content in book format helps you connect with readers who might never visit your website.
- Create a tangible record of your work — A book serves as a permanent archive of your best ideas and insights. This preserves your knowledge in a format that lasts beyond changing web technologies.
- Open new revenue streams — Selling books creates an additional income source, whether through eBook sales, print-on-demand services, or using your book as a lead magnet to grow your email list and attract higher-paying opportunities.
- Determine Your Goal and Target Audience
- Audit Your Blog Posts and Find Your Book’s Big Idea
- Select Posts and Turn Them Into a Book Outline
- Compile Your Book Content
- Bridge Posts, Fill Gaps, and Adapt Your Writing for a Book
- Edit and Polish Your Blog-to-Book Manuscript
- Format and Design Your Book
- Convert Your Manuscript Into Final Book Formats
- Publish and Sell Your Book
- FAQ: Common Questions About Turning a Blog Into a Book
- Additional Resources for Authors
Step 1: Determine Your Goal and Target Audience
Before you start selecting blog posts and organizing content, you need to be clear on what you want your book to achieve. This decision will shape everything from which posts you include to how you price and distribute the final product.Determine Your Goal
Start by asking yourself whether your book will primarily serve as a product for sale, a lead magnet to attract new readers, or a tool to build authority in your niche. Each goal requires a slightly different approach. If you’re creating a product for sale, then you’ll want to focus on providing comprehensive value that readers can’t easily find for free elsewhere. This might mean adding exclusive content, updated information, or a more structured learning experience. On the other hand, if your book will serve as a lead magnet, then you can offer it for free in exchange for email addresses. This approach works well when your main income comes from services, consulting, or higher-priced products.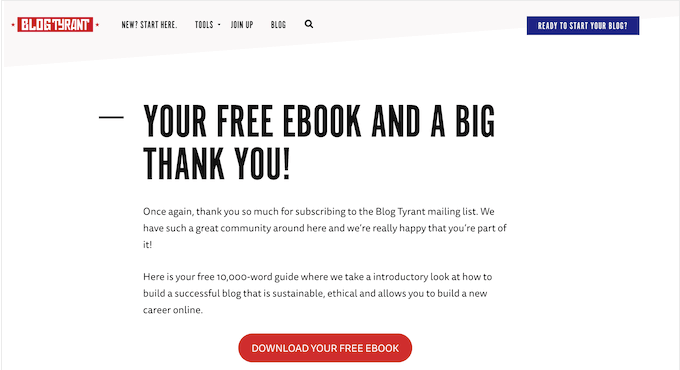
Determine Your Target Audience
Next, you’ll need to identify your ideal reader and the specific problem your book will solve. Think about how the book will appeal to both your existing audience and potential new customers interested in your niche. I recommend writing down a simple description of your target reader. For example: ‘Small business owners who want to improve their WordPress site’s SEO but don’t have technical skills.’ This clarity helps you make better decisions about which content to include. For details, you can see our guide on how to choose a target audience for your blog.
- eBook — Cost-effective to produce and distribute, with broad reach across multiple devices and platforms. eBooks are perfect if you want to get your book out quickly without upfront printing costs.
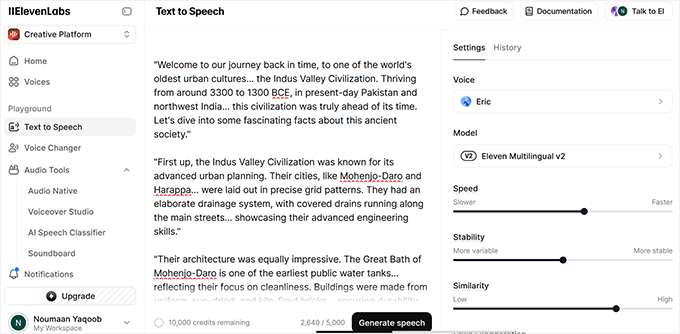
- Audiobook — Popular in audio markets and accessible for people who prefer listening while commuting or exercising. Audiobooks can command higher prices and reach audiences who might not read traditional books.
- Physical Book — Creates a tangible product that can be easier to sell at higher price points. However, it involves higher production costs and shipping considerations.
Step 2: Audit Your Blog Posts and Find Your Book’s Big Idea
Now that you know your goal and audience, it’s time to look at what you’ve already created. This step involves evaluating your existing blog content to find the posts that will form the foundation of your book.Audit Your Blog Posts
You’ll want to start by identifying your top-performing posts in terms of traffic and engagement. These articles have already proven they resonate with readers, which makes them strong candidates for your book. To track which posts are getting the most attention, you can use Google Analytics. If you haven’t set this up yet, see our beginner’s guide on how to install Google Analytics in WordPress using MonsterInsights, the best Google Analytics plugin for WordPress. Once you have MonsterInsights set up, simply go to Insights » Reports » Overview in your WordPress dashboard and look for the ‘Top Posts/Pages’ section. This report shows you exactly what is working.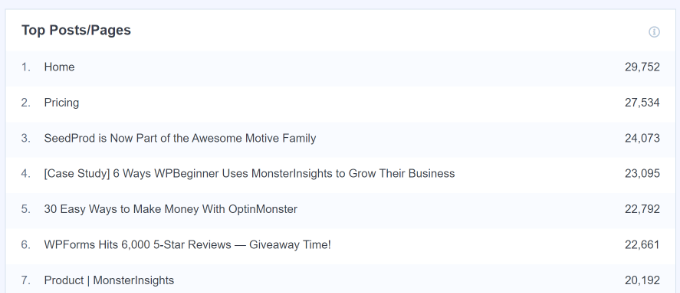
- High page views and readers who actually spend time scrolling or reading (instead of leaving immediately).
- Strong social shares and active comments.
- Comprehensive content that goes deep into a topic.
- Evergreen information that won’t quickly become outdated.
Find Your Book’s Central Theme
After you’ve compiled a list of your top posts, the next step is finding the central theme that ties them together. This is your book’s ‘big idea’: the core message or solution that runs through all your selected content. Look for patterns in your high-performing posts. Do they all relate to a specific aspect of your niche? Do they follow a particular journey or process? The connections between these posts will help you discover your book’s natural focus. I recommend grouping your posts into major themes first. For example, if you run a WordPress tutorial site, you might have clusters of posts about security, speed optimization, and SEO. Each cluster could become a section or chapter in your book.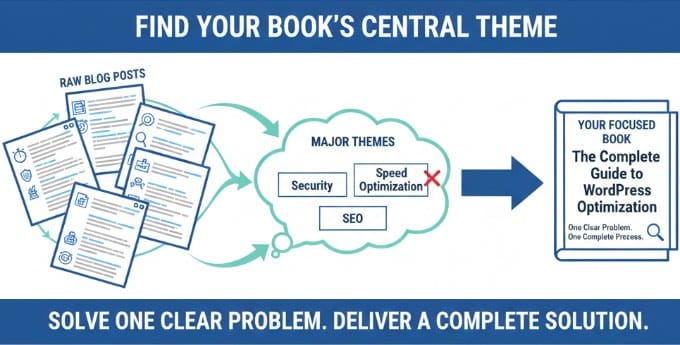
Step 3: Select Posts and Turn Them Into a Book Outline
With your themes identified, you need to make some tough decisions about which posts actually make it into your book. Not every blog post you’ve written will fit, and that’s perfectly fine.Decide on the Blog Posts to Include
You should only keep posts that align with your book’s main promise and support the journey you’re taking readers on. If a post feels off-topic or only loosely related, it’s better to leave it out rather than make your book’s message less clear.
Important: If your blog accepts guest posts, make sure you have the legal right to republish that content in a book for sale. Unless you have a specific agreement transferring the copyright to you, you may need to ask the original authors for permission or leave that post out of your book.
You should also avoid including topical content unless you plan to update it first. Posts about current WordPress trends or time-sensitive news won’t serve readers well in a book format. Instead, stick with evergreen content that remains valuable regardless of when someone reads it.
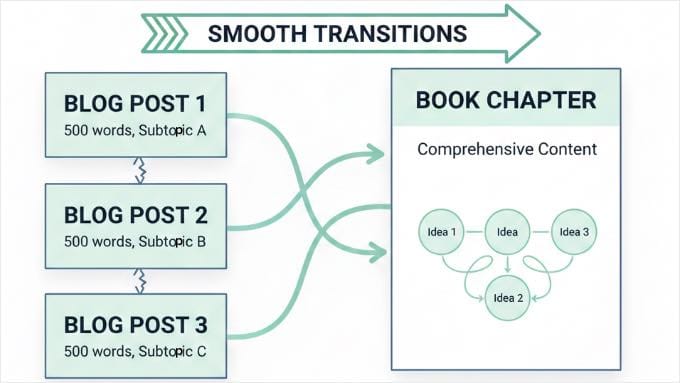
Look for opportunities to combine shorter posts into stronger chapters. If you have three 500-word posts about related subtopics, they might work better as a single complete chapter with smooth transitions between ideas.
I’ve found that readers prefer when books feel connected rather than like a collection of separate articles. This means you’ll need to think about how each piece of content flows into the next.
Decide on the Book’s Structure
Next, decide on your book’s overall structure. You have three main organizational approaches to consider:- Chronological structure works well if you’re teaching a process that has clear steps or a specific order. For example, ‘starting a blog‘ naturally follows a sequence from choosing a domain to publishing your first post.
- Thematic structure groups related content together by topic. This approach works when your content doesn’t need to be consumed in a particular order, like a book about ‘WordPress security tips’ where each chapter covers a different security aspect.
- Step-by-step structure is similar to chronological but focuses on a specific transformation or goal. This works perfectly for books like ‘How to Build Your First Online Course’ where readers follow a clear path from beginning to end.
Step 4: Compile Your Book Content
Now comes the practical work of gathering all your selected blog posts into a single document. You have two main approaches for this step, depending on how technical you want to get.Compile Your Book Content Manually
The manual method is straightforward and gives you complete control. Simply copy and paste your selected blog content into Google Docs to create a single document. You can start by creating a new Google Doc. Under the ‘View’ menu, make sure ‘Show Print Layout’ is checked so you can see exactly how your book pages will look. Copy your first post and paste it into the doc. Here is an important tip: instead of pressing ‘Enter’ multiple times to get to the next page, insert a proper page break at the end of every chapter. In Google Docs, you can do this by going to Insert » Break » Page break. This ensures your chapters always start at the top of a new page, no matter how much you edit the text later. Also, make sure to format your chapter titles using the Heading 1 style rather than just bolding the text. This allows Google Docs to automatically generate a Table of Contents for you later.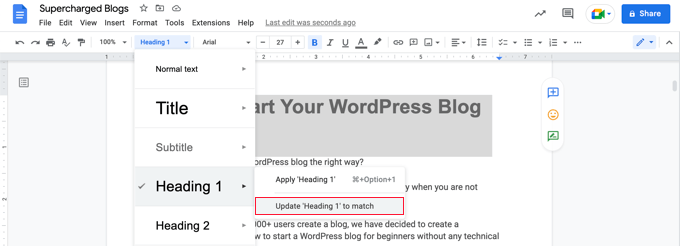
Compile Your Book Content With a Plugin
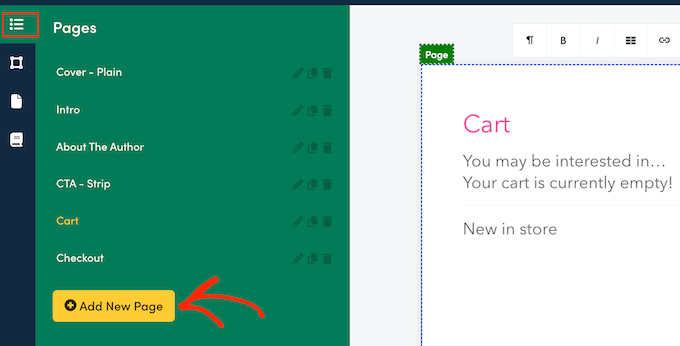
The plugin method offers a faster alternative if you want to automate the initial assembly. You can use the Beacon plugin to automatically compile your blog posts into a book format. Beacon is particularly well-suited for creating visually engaging eBooks with interactive, trackable features. However, if your goal is to produce physical books or audiobooks, I recommend you compile your book content manually, using the method above. First, you need to install and activate the Beacon plugin. For more details, see our step-by-step guide on how to install a WordPress plugin. Once activated, head over to the Beacon » Create page in the WordPress dashboard to start compiling your content in just a few steps: 1. Import Your Content Beacon will scan your site and display all available pages and posts. You can filter this content by ‘Pages’ and ‘Posts’ or select specific categories and tags to find your desired content quickly.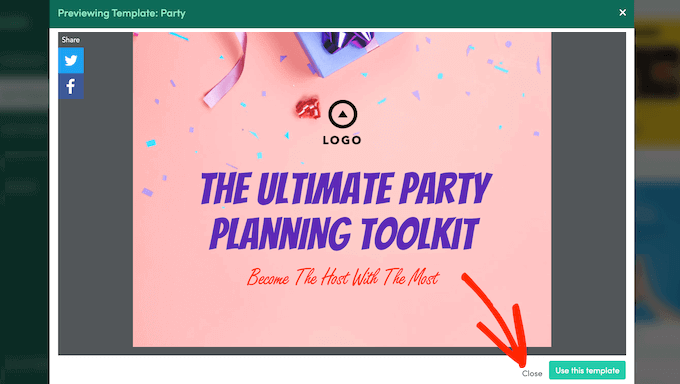
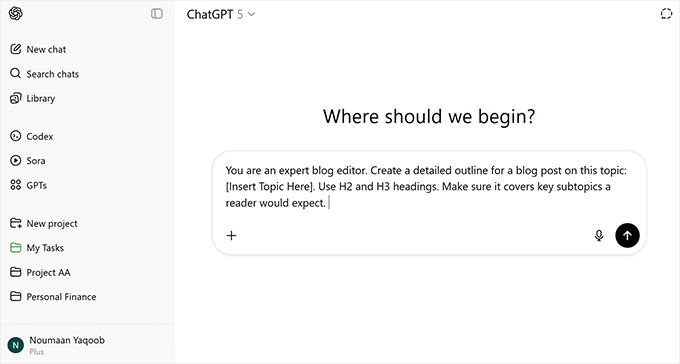
Bridge Posts, Fill Gaps, and Adapt Your Writing for a Book
With all your content compiled, you’ll notice something important: blog posts and book chapters aren’t quite the same thing. Blog posts are written to stand alone, while book chapters need to connect to form a complete story. This is where you turn your separate posts into a book that flows smoothly. It might feel like a big job, but this step is the difference between a simple collection of articles and a real book. AI can be incredibly helpful during this phase. Instead of struggling to write these edits from scratch, you can use ChatGPT or similar tools to do the heavy lifting. Here are 3 specific prompts you can copy and paste to speed up the process:- For Transitions: “I am combining two blog posts into book chapters. The first post is about [Topic A] and the second is about [Topic B]. Write a smooth transition paragraph to connect them.”
- For Content Gaps: “Read this chapter and identify any concepts that a beginner might not understand. What information is missing?”
- For Cleanup: “Rewrite the following text to remove blog-specific calls to action (like ‘subscribe’ or ‘leave a comment’) and make it sound like a book chapter.”
Write Bridges and Transitions
First, you can write bridges and transitions between your chapters. Each chapter should open with an introduction that connects to what came before and previews what’s ahead. To make this easy, you can use these simple fill-in-the-blank templates:- Chapter Opening: “In the last chapter, you learned [Concept A]. Now, we will explore [Concept B] so you can [Benefit].”
- Chapter Closing: “You now understand [Key Point]. Next, let’s move on to [Next Topic].”
Fill Content Gaps
You’ll also need to fill content gaps as you go through your manuscript. Sometimes you’ll find that your blog posts assume certain knowledge or skip steps that made sense in a blog context but won’t work in a book. Ask yourself this question: “If someone had never read my blog before, would they understand this section?” If the answer is no, then you need to add the missing explanations or examples. I recommend reading through your compiled content once just to identify these gaps. You can simply use the comment feature in Google Docs or Word to leave notes for yourself, and then come back to fill them in systematically.Remove Blog-Specific Elements
Another important edit is removing blog-specific elements. Delete calls to action like ‘Subscribe to my newsletter’ or ‘Leave a comment below.’ These don’t make sense in a book format. You should also update any references that mention ‘this blog post’ to say ‘this chapter’ instead. Small changes like this help the content feel like it was written specifically as a book.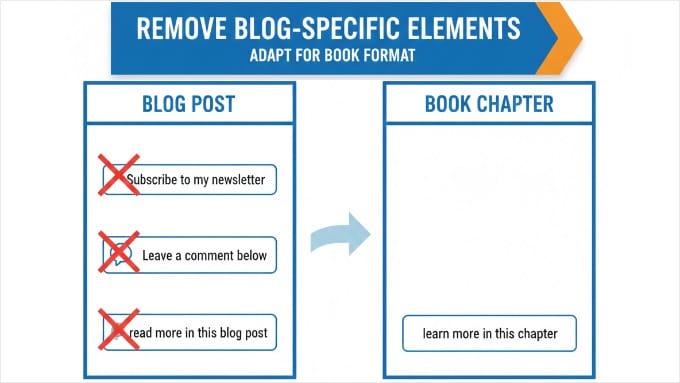
Decide on Your Book’s Length and Scope
Finally, you’ll need to decide on your book’s length and scope. Typical word counts vary by genre and format:- Short eBooks or guides: 10,000-20,000 words
- Standard non-fiction books: 40,000-60,000 words
- Comprehensive guides: 60,000-80,000 words
Step 6: Edit and Polish Your Blog-to-Book Manuscript
Once your content is compiled and connected, it’s time to refine it into a polished manuscript. This editing phase is important because it transforms your rough assembly into a professional-quality book.Start With Big-Picture Edits
I prefer to start with structural and content edits that focus on the big picture. You’ll want to read through your entire manuscript and check for flow, consistency, and adherence to your book’s main promise. Here are a few questions I ask myself as I read:- Does the order of the chapters make sense?
- Are there parts where I am repeating myself?
- Does the book actually keep the promise I made in the introduction?
- Reorder Your Chapters: Make sure the big-picture flow makes sense from beginning to end.
- Cut the Repetition: Delete any stories, examples, or explanations that appear more than once.
- Fill in the Gaps: Add missing context or steps where a beginner might get confused.
- Connect the Dots: Rewrite your intros and outros so chapters flow smoothly into each other.
- Polish the Prose: Finally, save your spelling and grammar checks for the very last step.
Move on to Sentence-Level Edits
After addressing the big-picture issues, you can move on to line editing and proofreading. This is where you focus on the sentence level, improving word choice, fixing grammar, and ensuring consistency throughout. Pay special attention to standardizing your tone across chapters. Blog posts written months or years apart might have slightly different voices, so you’ll need to smooth out these variations.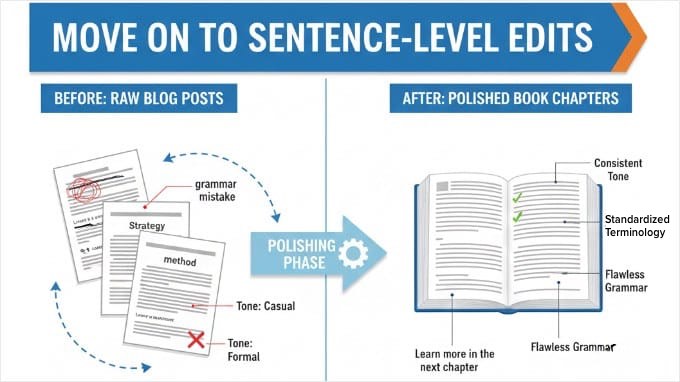
Step 7: Format and Design Your Book
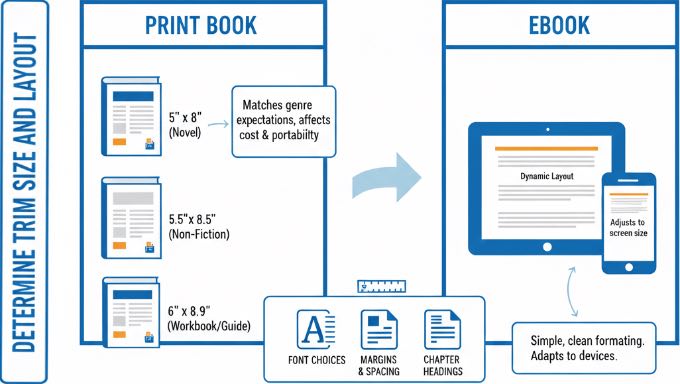
Before converting your manuscript into final book formats, you need to make some decisions about how your book will look. Professional formatting and design can make the difference between a book that looks self-published and one that appears professionally produced.Determine Trim Size and Layout
First up, you’ll need to determine your trim size and layout. Trim size refers to the physical dimensions of your book, and it affects everything from printing costs to how readers experience your content.
Expert Tip: Always test your book’s layout on a mobile device. While PDFs preserve formatting for print, they can be difficult to read on small screens because they don’t reflow. If your audience primarily uses phones, an ePub format is the better choice for accessibility.
How to Decide on a Trim Size
For eBooks, you don’t need to worry as much about trim size since digital formats adjust to different screens.
However, for print books, the size you choose should match reader expectations for your genre.
Create a Professional Book Cover
Next, it’s time to design or commission a book cover. Your cover is the first thing potential readers see, and it plays a huge role in whether they decide to learn more about your book. A professional-looking cover communicates that you’ve put care and quality into your work. Even if your content is excellent, a poor cover design can discourage people from reading it. If you have an eye for design, then you can create the cover yourself using software like Adobe Photoshop or Illustrator. However, the easiest way for beginners to get started is with Canva. It offers thousands of professional book cover templates that you can customize with a simple drag-and-drop interface.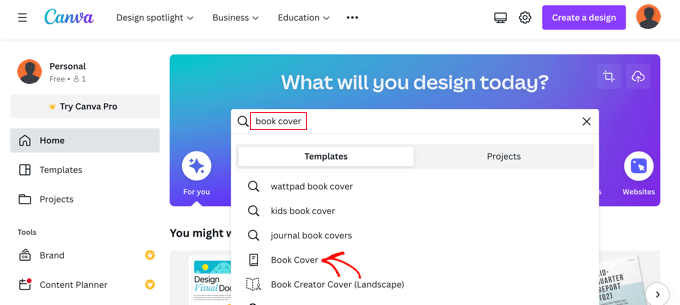
Tools for Formatting Books
For the actual formatting work, several tools can help make the process easier. BlogBooker and Into Real Pages are particularly useful for formatting blog content and making physical copies that look professional. These tools handle many of the technical details automatically, such as adding page numbers, creating a table of contents, and ensuring proper margins for printing. They’re especially helpful if you’re new to book formatting and want to avoid common mistakes. Remember that different formats have different requirements. An eBook might look perfect on screen, but need adjustments for print, particularly regarding images, colors, and page breaks. And take time to preview your formatted book before finalizing it. Most publishing platforms offer preview tools that let you see exactly how your book will appear to readers.Step 8: Convert Your Manuscript Into Final Book Formats
With your manuscript edited and polished, you’re ready to transform it into the actual book formats you’ll distribute. This step involves some technical decisions, but the process is more straightforward than you might think. Since this section covers multiple format options, here’s a quick guide to help you jump to the format that applies to you: Let’s explore each option in detail.eBooks
eBooks are the most accessible format for most authors. They’re cost-effective to produce, easy to distribute, and work across multiple devices and platforms. The simplest approach is to export your manuscript as a PDF for direct distribution, either through your website or via eBook marketplaces. Most word processors and Google Docs can export to PDF with just a few clicks. However, keep in mind that PDFs have fixed layouts, which can be difficult to read on small mobile screens or eReaders compared to dynamic eBook formats.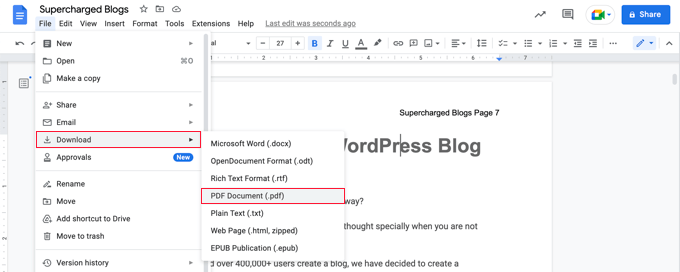
Audiobooks
Audiobooks have become very popular, and they allow you to reach audiences who prefer listening over reading. To create an audiobook from your manuscript, you will need a different approach than eBooks, but it’s more accessible than ever. ACX is the most popular platform for producing and distributing audiobooks. It provides options for professional narration and automatically lists your audiobook on Audible, Amazon, and Apple Books. The platform is user-friendly and taps into a large audio consumer base.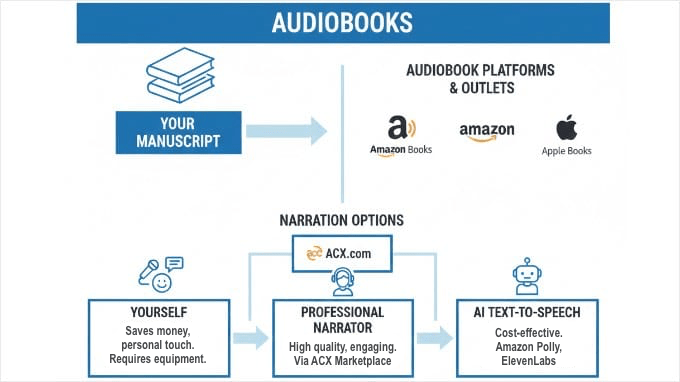
Physical Books
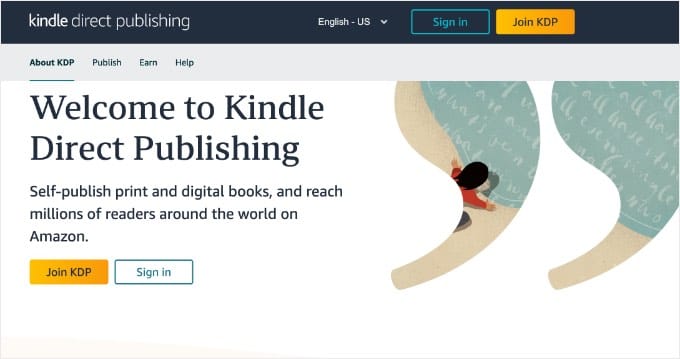
If you want to offer physical copies, print-on-demand (POD) services make this possible without requiring large upfront investments or inventory management. Amazon KDP‘s print service is the easiest starting point for most authors. It handles on-demand printing of books, manages inventory and shipping, and makes physical copies available alongside your eBook automatically. The process is straightforward: you upload your formatted manuscript and cover design, set your pricing, and KDP handles everything else. When someone orders your book, it’s printed and shipped directly to them.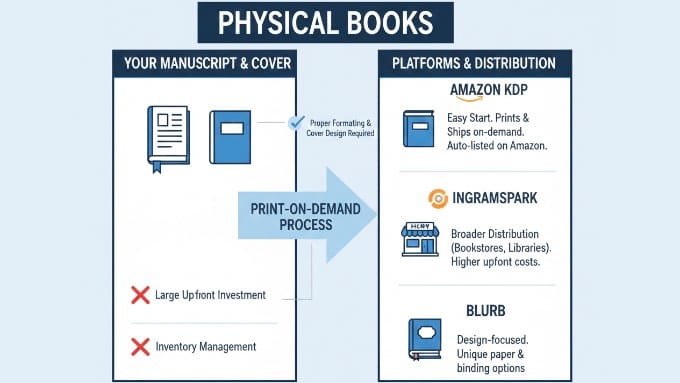
Enhance Search Visibility
Regardless of which format you choose, you’ll want to make sure your book is easily discoverable online. First, I recommend following our complete WordPress SEO guide. It teaches you everything you need to know about optimizing your website for search engines so that you can get more traffic. You can also add book schema (which includes your ISBN) to your WordPress site to significantly improve how search engines understand and display your book.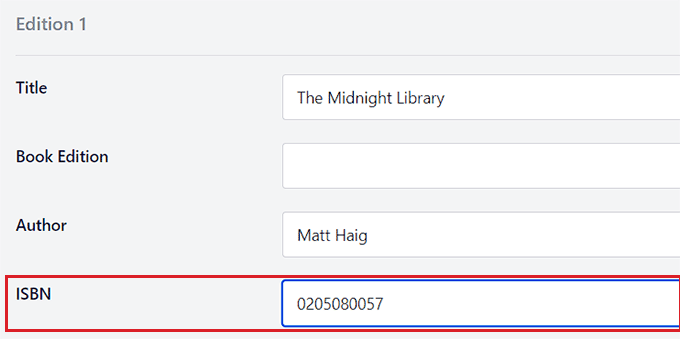
Step 9: Publish and Sell Your Book
With your book formatted and converted into the right formats, you’re ready to share it with the world. The publishing and selling process has become remarkably accessible for independent authors, giving you multiple paths to reach your readers. You have several options for self-publishing your book, whether as an eBook, audiobook, or print book. Each format opens different distribution channels and reaches different segments of your audience.
Tip: If you don’t already have a website to sell your book from, now is the time to create one. See our guide on how to create an author website in WordPress.
Now, let’s look at the best ways to sell each type of book format:
How to Sell eBooks
For eBooks, you have complete flexibility in how and where you sell. When you sell directly from your WordPress site, you keep more of each sale and build your own customer list. You’re not dependent on third-party platforms, and you can bundle your book with other products or services. To do this, I recommend using Easy Digital Downloads, the best WordPress eCommerce plugin for selling digital products.
How to Sell Audiobooks
Audiobooks typically sell through specialized platforms that handle the technical delivery of large audio files. Services like ACX will distribute your book to Audible, Amazon, and Apple Books, handling the payments and delivery for you. However, these platforms often take a significant cut of your royalties. If you want to keep more of your earnings, you can sell audiobooks directly from your own site.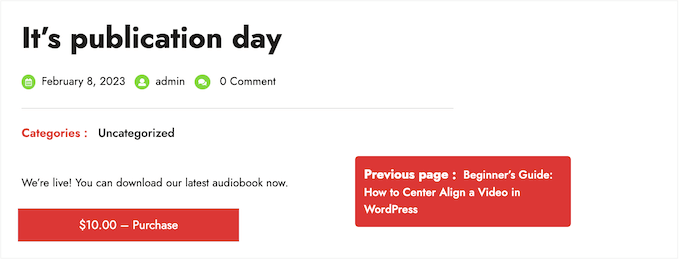
How to Sell Physical Books
Physical books can be sold through your own online store using WooCommerce. This eCommerce plugin handles inventory management, shipping calculations, and payment processing, giving you a professional storefront right on your WordPress site. If you’re planning to sell physical products alongside your books, then our guide called WooCommerce Made Simple provides complete instructions for setting up a full eCommerce site.How to Sell a Single Product
If you’re only selling one book and don’t need a full store setup, there’s a simpler option. You can sell a single product or service using WP Simple Pay, the best Stripe payment plugin for WordPress. This approach is perfect for authors who want to keep things simple and focus on promoting one main book. It eliminates the complexity of managing a full store while still providing secure payment processing.How to Use Your Book as a Lead Magnet
You don’t always have to sell your book directly. Many smart authors use their eBook as a ‘lead magnet’, which is a free gift offered to readers in exchange for their email address. This is one of the most effective ways to build a loyal audience through your email newsletter. To do this, I recommend using Beacon to generate your lead magnet. As I mentioned earlier, it handles the design work automatically and creates a polished PDF that is perfect for giving away. Once your file is ready, you can use OptinMonster to deliver it to your readers. OptinMonster allows you to create high-converting popups and floating bars that offer your free book to visitors at the perfect moment.
FAQ: Common Questions About Turning a Blog Into a Book
Here are some common questions and answers about the process of transforming your blog into a book. These FAQs address considerations about publishing, book formats, legal aspects, and technical issues. 1. Will readers pay for content that was originally on a blog? Yes, readers are often willing to pay for content that offers additional value beyond what’s freely available on your blog. The key is providing enhanced structure, updated information, exclusive insights, or the convenience of having all the material organized in one place. Offering bonus materials or additional chapters that aren’t on your blog can also add extra value. Many readers prefer the book format for focused learning and are happy to pay for a well-organized, comprehensive resource. 2. Do I need an ISBN to publish my book, and how do I add it to WordPress? An ISBN is usually necessary for print books if you plan to sell them in bookstores or libraries. However, for eBooks, you often do not need an ISBN at all. Amazon KDP can assign a free identifier called an ASIN for your Kindle books, and a free ISBN for your print books if you stick to their platform. If you do choose to use ISBNs, keep in mind that you need a separate ISBN for each format. You cannot use the same number for your eBook, audiobook, and physical book. 3. Do I need to delete or hide the original blog posts once the book is published? No, there is no requirement to delete your original blog posts after publishing a book. Many authors choose to keep their posts online and still successfully market and sell their books. 4. Are there legal considerations to keep in mind when turning blog posts into a book? Yes, it is essential to review any existing contracts or agreements related to your blog content. This is particularly important if you have published articles for other platforms or have partnership agreements. You may need to obtain legal advice or permissions to use certain content in a commercial book format. Always ensure that your use of content aligns with any legal restrictions or publishing agreements. 5. What are some effective ways to distribute and sell a self-published book? The best way to increase your profit is to sell your book directly on your own website. For eBooks and audiobooks, we recommend using Easy Digital Downloads because it is designed specifically for selling digital files. If you plan to sell physical copies, WooCommerce is the best choice for a full online store. You can also use WP Simple Pay if you just want a simple buy button without a shopping cart. To reach a wider audience, you should also list your book on major marketplaces. Platforms like Amazon Kindle Direct Publishing (KDP) are excellent for reaching readers who might not know your website yet.
Warning: If you publish on Amazon, be careful about enrolling in KDP Select. While it offers benefits like being in Kindle Unlimited, it requires digital exclusivity. This means you are legally not allowed to sell the eBook version on your own website while enrolled (though you can still sell physical copies anywhere).
6. Will publishing a book hurt my blog’s SEO (duplicate content)?
No, publishing a book based on your blog posts will not hurt your SEO. Google understands that books and blog posts are different mediums. In fact, listing a book on Amazon and linking it to your site can actually increase your authority and perceived expertise in Google’s eyes.
Additional Resources for Authors
Once you’ve turned your blog into a book, you might be interested in exploring further resources to improve your publishing journey and grow your author platform. Here are some valuable WPBeginner articles to consider:- How to Create and Sell Ebooks in WordPress from Start to Finish: This guide walks you through the complete process of creating and selling eBooks on your WordPress site, offering detailed steps for digital publishing.
- How to Sell Audiobooks Online: If you’re considering expanding your book offerings to include audiobooks, this article outlines easy methods to sell them effectively.
- How to Create an Author Website in WordPress: A dedicated website can significantly boost your author platform. This guide helps you set up a professional author site on WordPress.
- Best WordPress Themes for Selling eBooks: Choosing the right theme can aid in creating a visually appealing online store for your eBooks. Explore these theme options to enhance your site’s aesthetics.
- Best WordPress Themes for Authors: Specialized themes can help you highlight your author identity and showcase your books attractively.
- How to Add GTIN, ISBN & MPN Schema in WordPress: Enhance your book’s visibility in search results by learning how to add structured data schema to your WordPress site.
- How to Easily Save a Blog Post to Your Computer: Keeping an offline copy of your blog content can be useful for backups or future projects.


Leave a Reply