Automating your WordPress site doesn’t have to feel like rocket science.
Tools like Make.com are powerful, but for many beginners, they can feel overwhelming. Between extra connection steps and complex setups (like webhooks), it’s easy to get stuck before anything actually works.
That’s where a plugin like Uncanny Automator makes a big difference. It lets you build Make.com–style workflows in WordPress using a simple setup that feels familiar and easy to follow.
You can connect your favorite plugins, trigger actions based on what users do on your site, and even add AI-powered tasks in just a few minutes.
In this guide, I’ll show you how I automated my WordPress site to work like Make.com.
The goal is simple: spend less time on repetitive tasks, keep things running smoothly, and focus more on growing your site instead of managing it.
💡Quick Answer: How to Add Make.com-Style Automation in WordPress
You can create Make.com-style automation in WordPress using Uncanny Automatorby setting up a simple “if this happens, then do that” workflow, called a recipe. You choose a trigger, like publishing a new post, then decide what should happen next, such as generating an AI summary and saving it to Google Sheets. Once the recipe is set to Live, it runs automatically every time that trigger occurs.
Here is an overview of all the topics that I’ll be covering in this guide:
I moved away from Make.com because it became harder to manage as my site grew. While it’s a powerful automation tool, the setup and maintenance can feel like too much if you just want things to work inside WordPress.
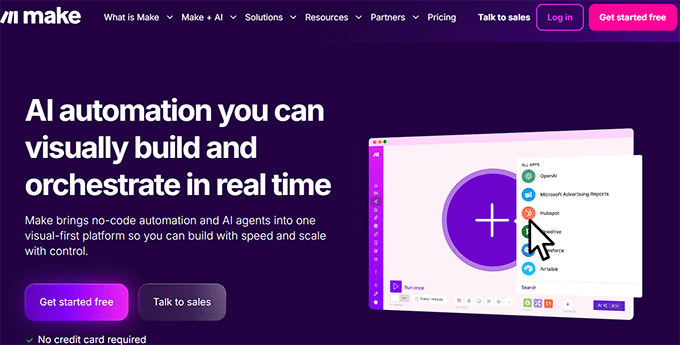
Make.com is a visual automation platform that helps you connect different apps and services using workflows called scenarios.
You build these workflows by dragging and connecting blocks, so when something happens in one app, it triggers actions in another.
It’s a great tool, but for many WordPress site owners, it can feel disconnected from how WordPress actually works day to day.
Over time, I wanted something simpler and more tightly integrated with my site.
3 Challenges That Made Me Switch Away From Make.com
Make.com stopped working for me once everyday automations began taking more time to set up and maintain than the tasks themselves.
Here are the three biggest reasons I decided to move away:
Challenge
What It Means
Why It Matters
Steep Learning Curve
Even simple workflows require hours of tutorials to understand modules like Routers, Iterators, and Aggregators.
Beginners can get stuck before automations even start working.
Unpredictable Pricing
Costs depend on “operations,” which means you pay for every single internal step, filter, and logical check—not just the final result. Processing the exact same 500 WooCommerce orders can cost significantly more if you add a simple filter.
Hard to budget as your site traffic or sales grow.
Extra Complexity with WordPress
Integrating Make.com requires APIs, webhooks, and third-party connections. Workflows can break when plugins update,
Ongoing troubleshooting slows you down and adds stress.
At that point, I realized I needed an automation solution that felt simpler, more predictable, and built specifically for WordPress.
What Make.com Does Really Well
In plain English, Make.com is great when you need lots of ‘if this, then that’ paths and you’re connecting many apps outside WordPress.
For instance, it has:
A visual flowchart builder that lets you design automations by connecting steps visually, making it easy to understand how data moves from one action to the next.
Built-in branching and routing using Router modules, so different actions can run based on conditions you set.
A large integration library, with access to thousands of apps and services that you can connect without building everything from scratch.
Advanced automation logic, including Iterators and Aggregators for working with lists of data, plus filters to control when actions run.
These features are great when you need detailed control over complex workflows. However, for many everyday WordPress automations, they can feel like more than you actually need.
When Does Using Make.com Still Make Sense?
Even though I moved away from Make.com, there are situations where it still works well:
For Apps Outside WordPress – If you need to connect tools that Uncanny Automator doesn’t support, then Make.com gives you access to thousands of apps.
Already Heavily Invested – If you’ve built a lot of workflows in Make.com, then switching everything might not be worth it right away.
Advanced HTTP Modules – While Automator Pro handles most webhook needs, some very advanced HTTP requests might still be easier in Make.com.
In most everyday WordPress use cases, Automator handles everything smoothly, but it’s good to know Make.com can still be useful in these scenarios.
🌟The Solution: Why Uncanny Automator Feels Like Make.com But Easier
After running into too many challenges with Make.com, I finally found a solution that checks all the boxes: Uncanny Automator.
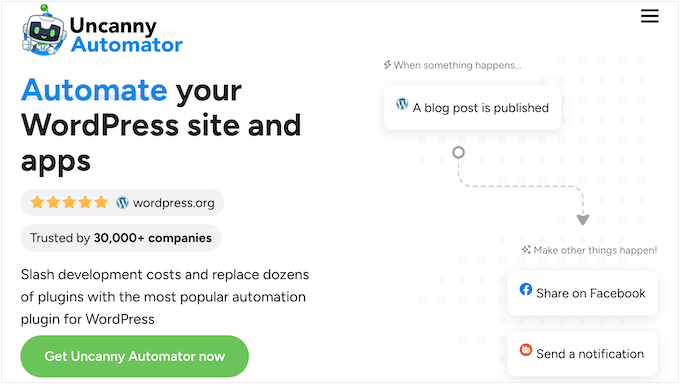
It is the best WordPress automation plugin that lets you connect your favorite plugins, WordPress features, and hundreds of external apps. You build workflows—called Recipes—using a simple visual builder.
It works like Make.com, but everything happens inside WordPress, so setup is faster, management is simpler, and scaling your site is easier.
With Automator, you get the power of advanced automation without learning new modules, dealing with broken workflows, or watching your monthly costs spike unexpectedly.
How Uncanny Automator Saves You Money
One of Uncanny Automator’s biggest advantages is cost-effectiveness. Because you pay a flat annual fee for unlimited Recipes and actions, you avoid the unpredictable per-operation costs that Make.com can add up to.
Usage Scenario
Make.com Est. Yearly Cost
Automator Pro Yearly Cost
Annual Savings
500 complex WooCommerce orders/month
$183
$149
$34+
1,000 form submissions/month
$348
$149
$199+
💡 Key advantage: Automator lets you create unlimited workflows and actions inside WordPress. While external tools like OpenAI may still charge usage fees, you won’t pay extra to Automator just for running the automation itself.
If you want to see exactly how Automator compares to Make.com in everyday WordPress workflows—and why it’s simpler and faster—just expand the section below:
Technical Feature Showdown: Make.com vs. Automator
Feature
Make.com
Automator
Why Automator Wins
Conditional Logic
Add a Router module, configure filter conditions, and connect paths
Add Condition → select field, operator, value → actions run based on true/false
Easier to create rules based on user behavior
Processing Lists
Requires the “Iterator” module to split data lists using complex mapping
“Run an action for each item in a list” → map repeater field → create action inside loop
Automates repeated tasks like handling orders or form submissions quickly
Data Transformation
Write formulas, JSON, or RegEx
Use tokens ({{user_email}}) + visual Data Formatter (split text, math, AI summary)
Lets you change and format data visually without coding
WordPress-Native Advantage
Requires API/webhooks → slight delays
Direct database access → instant triggers
Faster, more reliable, less troubleshooting
Real-World Workflow: How to Automate Blog Post Summaries with Uncanny Automator
With Uncanny Automator, you can create complex workflows much more easily than with Make.com. You don’t need to worry about APIs or webhooks because everything happens right inside WordPress.
Here are a few examples of what you can do:
Automatically add new WooCommerce orders to a Google Sheet for easy reporting.
Send notifications or emails whenever a new post goes live.
Summarize post content using AI and store it in a spreadsheet for easy reference.
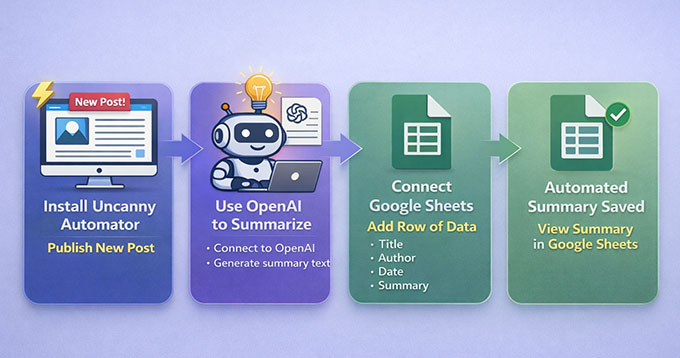
In this article, I’m going to show you how to create a workflow that automatically generates an AI summary and adds it to Google Sheets whenever a new blog post is published.
Here’s how it will work:
Even if you never store blog summaries in Google Sheets, this workflow teaches you the exact pattern you’ll use for automating forms, WooCommerce orders, email reports, and AI content across your site.
Once you understand this setup, you can reuse the same steps for almost any other automation on your WordPress website.
What You’ll Need for This Tutorial:
A WordPress website where you can install plugins (administrator access).
Uncanny Automator. You’ll need the Pro version for this OpenAI + Google Sheets workflow.
A Google Sheet ready. Even a blank one works, but it helps to add column headings in advance, like Post Title, URL, Date, and Summary.
Step 1: Install and Activate Uncanny Automator
The first thing you need to do is set up Uncanny Automator on your WordPress site.
Start by signing up for an account on the Uncanny Automator website. Just click the ‘Get Uncanny Automator now’ button and follow the steps to create your account.
📍Note: The free version includes limited credits to try app integrations. However, for a permanent workflow that runs automatically like this one, you will need the Pro plan.
Next, go to your WordPress dashboard to install the plugins. First, install the free core plugin from the WordPress repository. Then, install the premium plugin using the ZIP file you can download from your Uncanny Automator account.
The premium plugin unlocks the integrations you need for OpenAI and Google Sheets. If you’re unsure how to do that, check our step-by-step guide on installing WordPress plugins.
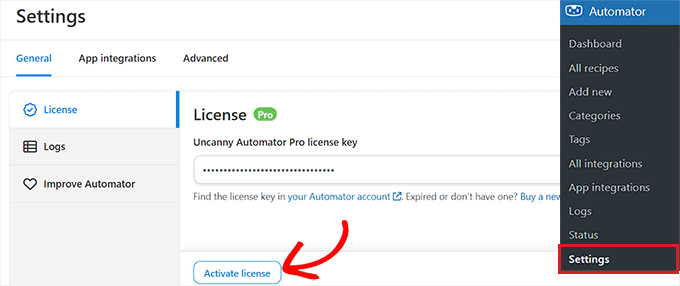
Upon installation, it’s time to activate your license. Go to Automator » Settings in your WordPress dashboard and enter the license key from your Uncanny Automator account.
Click the ‘Activate License’ button, and your website will be ready to start creating automation workflows.
Step 2: Connect OpenAI to Uncanny Automator
For this workflow to work, you need to connect your OpenAI account to Uncanny Automator. This allows OpenAI to automatically generate summaries of your blog posts before they are added to your Google Sheets reports.
The good news is you only have to connect it once.
To get started, you’ll need your OpenAI secret key. A secret key is a unique code that tells OpenAI it’s really you using their service. It keeps your account secure and allows Uncanny Automator to access OpenAI safely.
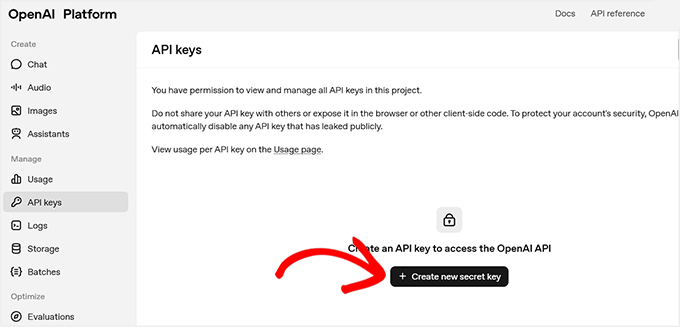
To find your secret key, log in to your OpenAI account and go to the ‘API Keys’ tab in the left-hand menu. Here, click the ‘Create new secret key’ button.
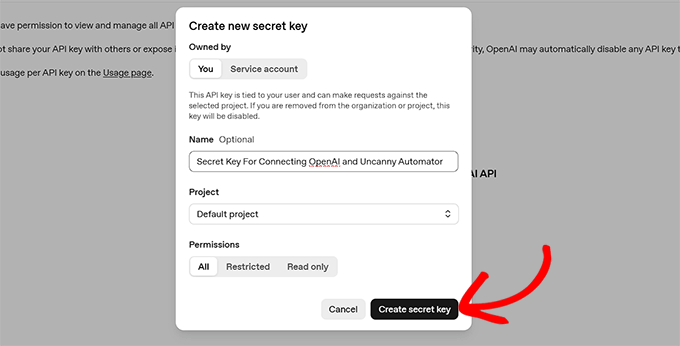
You’ll be prompted to give it a name—this is just for your reference, so you can identify it later.
📍Important: Your OpenAI API account is completely separate from a ChatGPT Plus subscription. You must purchase pre-paid credits in your OpenAI Platform billing settings for the API key to work. Without a credit balance, the automation will fail.
Once you’ve added credits, click ‘Create Secret Key’.
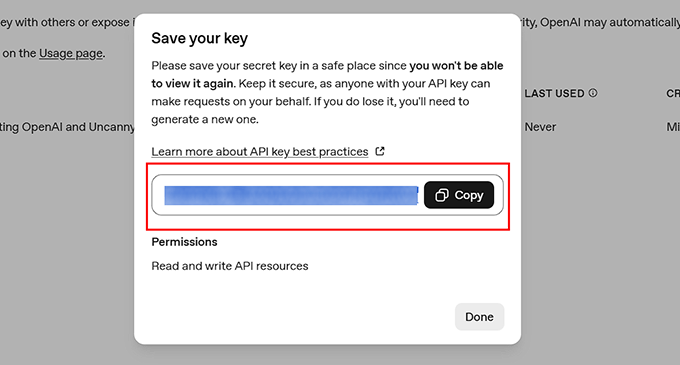
OpenAI will generate the key and display it in a popup.
Copy this key and store it somewhere safe, because you won’t be able to see it again.
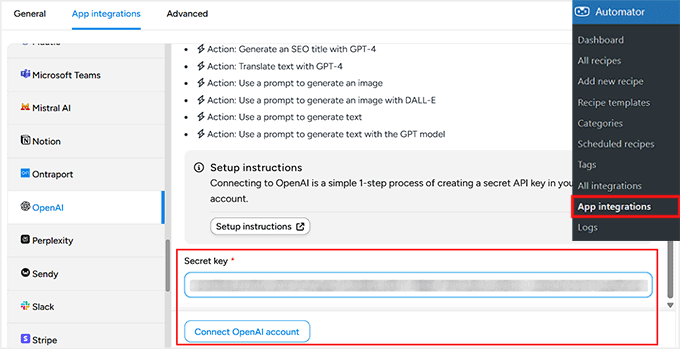
Next, go to your WordPress dashboard and open the Automator » App Integrations page. Then, switch to the ‘OpenAI’ tab on the left and paste your secret key into the ‘Secret Key’ field.
After that, click ‘Connect OpenAI Account’. Once this is done, your Uncanny Automator and OpenAI accounts are connected.
Now you’re ready to add triggers and actions using OpenAI in your workflows. This connection allows you to automatically summarize posts or perform other AI-powered tasks whenever a workflow runs.
Step 3: Connect Uncanny Automator to Google Sheets
The next step is to connect Uncanny Automator to Google Sheets. This will allow all your blog post summaries to be added to your chosen spreadsheet.
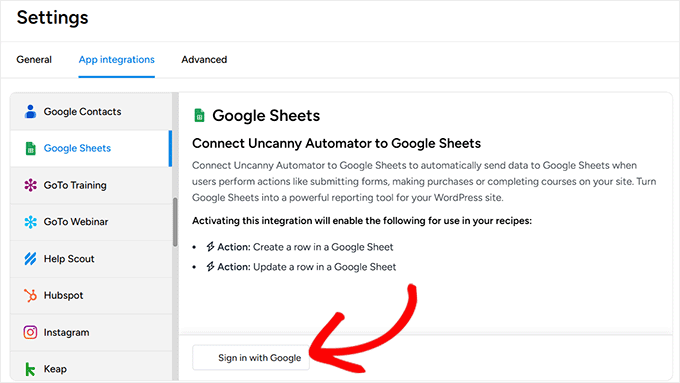
To get started, go to Automator » App Integrations in your WordPress dashboard and select ‘Google Sheets’ from the left-hand menu.
Click the ‘Sign in with Google’ button and choose the account you want to link. If your account isn’t listed, you can add it using the ‘Use Another Account’ option.
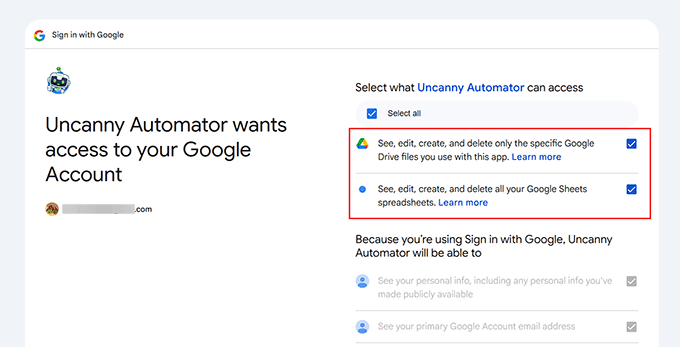
Next, Google will ask for permissions so Uncanny Automator can access your spreadsheets.
This is completely normal, and the plugin only uses these permissions to add new rows to the spreadsheets you select.
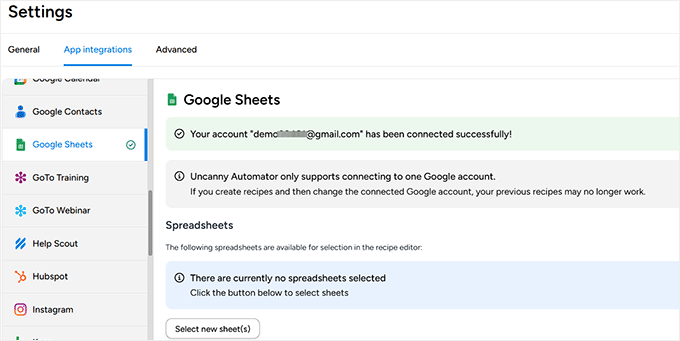
Once you approve, you’ll be redirected back to your WordPress dashboard with a confirmation that your Google account is connected.
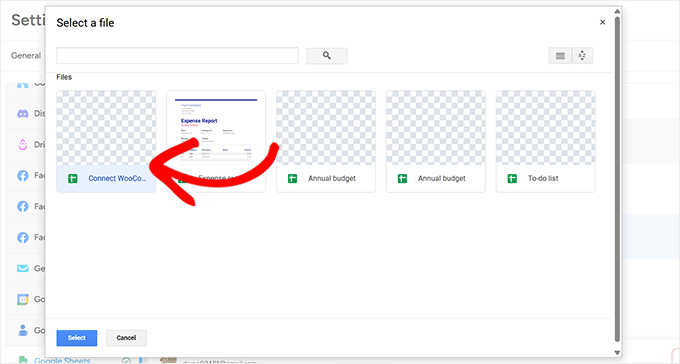
Finally, click ‘Select new sheet(s)’ and choose the spreadsheet you want to use for storing your post summaries.
You can add multiple spreadsheets if needed, and all connected sheets will appear in the recipe editor when building automations.
If you want a more detailed guide, check out our tutorial on how to connect WooCommerce to Google Sheets.
Once your spreadsheet is connected, you’re ready to start building a workflow that summarizes posts and automatically sends them directly to Google Sheets.
Step 4: Create Your Recipe in Uncanny Automator
Once you’ve successfully connected OpenAI and Google Sheets, it’s time to create a recipe in Uncanny Automator.
In Automator, a recipe is what defines your automation. Each recipe has two main parts: the trigger, which starts the automation, and the action, which is what happens next.
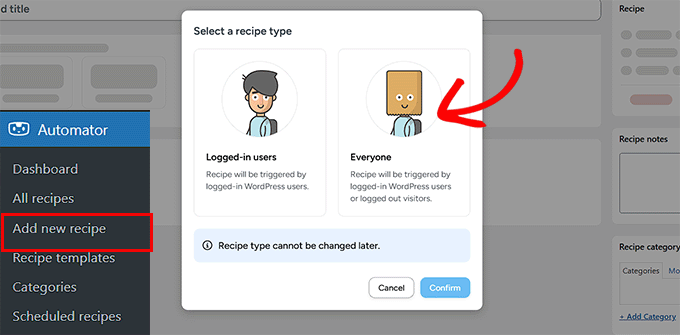
To start, go to Automator » Add New Recipe from your WordPress dashboard. You’ll be asked to choose between a ‘Logged-in’ recipe and an ‘Everyone’ recipe. Logged-in recipes only run when a user is signed in.
For this workflow, I recommend selecting Everyone.
Here’s why: If you schedule posts to be published automatically in the future, WordPress publishes them in the background (using the system cron) rather than using a logged-in user. Selecting ‘Everyone’ ensures the automation runs reliably for scheduled posts, too.
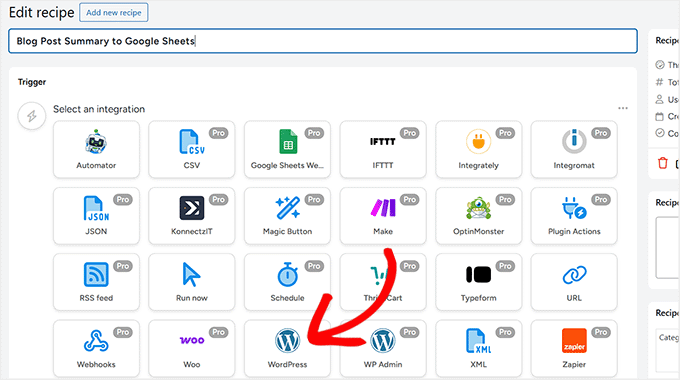
Next, give your recipe a name that makes sense, like ‘Blog Post Summary to Google Sheets’. This will help you identify it later when you create more recipes.
After that, Uncanny Automator will show a list of all plugins and services installed on your site. Select ‘WordPress’ as the integration platform for your trigger.
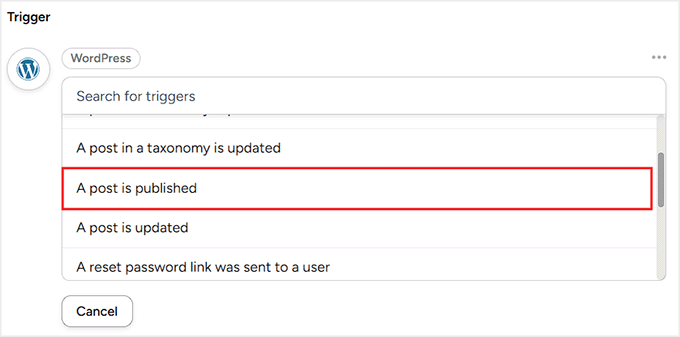
Then, choose the event that should start the recipe. For this workflow, select ‘A post is published’.
This ensures that every time a new post goes live, the recipe will run automatically.
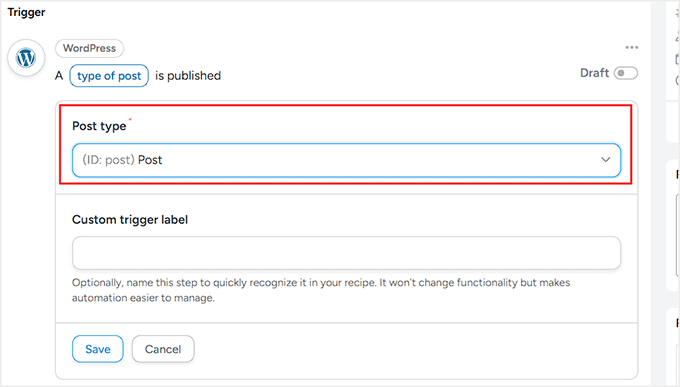
Finally, you’ll need to select the post type. By default, Uncanny Automator applies the trigger to all post types, including posts, pages, and products.
Since this workflow is only for WordPress blog posts, select ‘Post’ from the dropdown menu. Once that’s done, click ‘Save’ to activate your trigger.
Step 5: Add the OpenAI Action to Generate Blog Post Summaries
Now that your trigger is set, it’s time to add the first action for your recipe: generating a summary of the blog post using OpenAI.
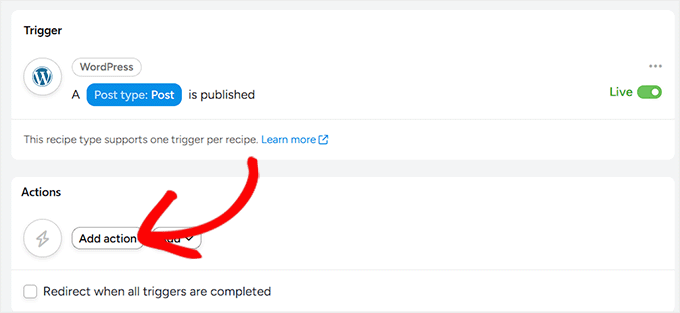
To start, click the ‘Add Action’ button inside your recipe.
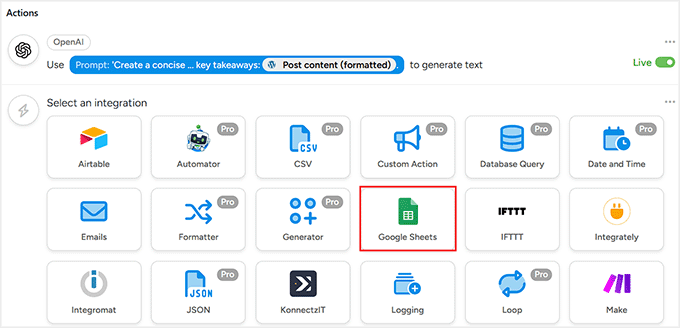
This will open a list of integrations for your action.
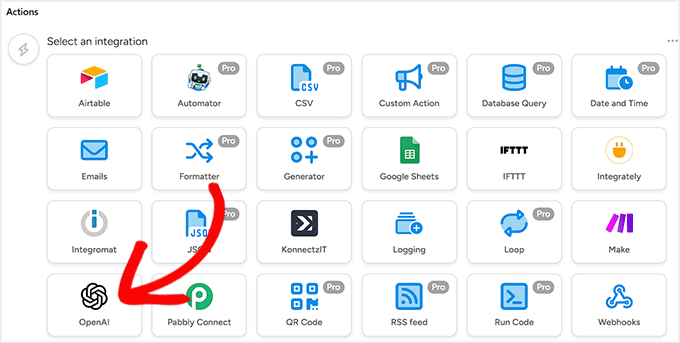
Since you’ve already connected OpenAI, click on it to select the platform.
You’ll see a list of actions OpenAI can perform.
For this workflow, select ‘Use a prompt to generate text’. This tells OpenAI exactly what content to create.
Next, choose the OpenAI model. I recommend the latest available model, as it produces the most natural and accurate summaries.
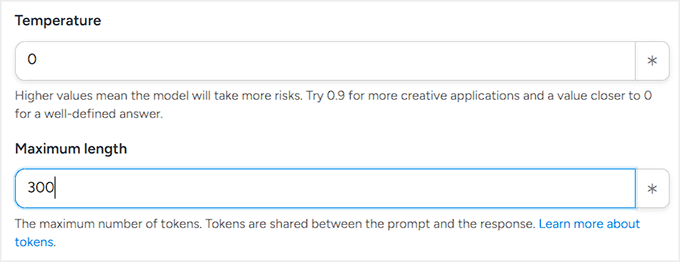
Now, set the Temperature. This controls how closely the AI sticks to the facts versus how creative it gets. For a blog summary, you want the AI to be predictable and factual, so I recommend setting the temperature to 0.
Set the maximum number of tokens next. Tokens are the units OpenAI uses to measure text. Roughly speaking, 1 token is about 1 word or 4 characters. So a 200-word summary would need around 300–350 tokens.
Tokens also affect pricing. Keep in mind that OpenAI charges for both the text it reads (your blog post) and the text it writes (the summary). Setting the Maximum Tokens to 300 ensures the summary doesn’t get too long, helping you control your costs.
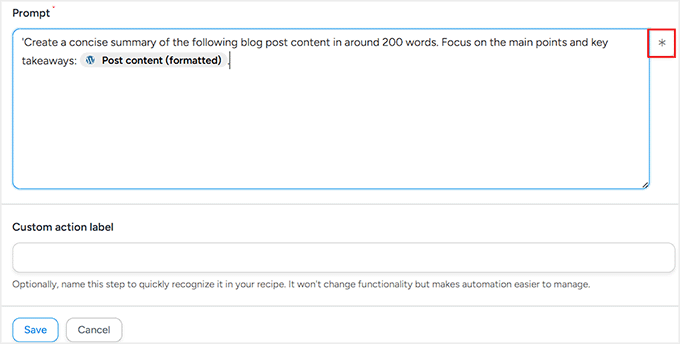
Finally, set your prompt. A good prompt clearly tells OpenAI what you want. For this workflow, you could use something like:
‘Create a concise summary of the following blog post content in around 200 words. Focus on the main points and key takeaways: {{Post Content (Formatted)}}.‘
If you’re new to creating prompts for AI, please take a look at our guide to the best AI prompts for bloggers, marketers, and social media.
Here, the {{Post Content (Formatted)}} token ensures OpenAI knows exactly which blog post to summarize. This is different from an OpenAI API token (the secret key you connected earlier).
The OpenAI token grants Automator access to OpenAI, while these recipe tokens tell the AI which content to include in the generated text.
You can add these tokens by clicking the asterisk in the prompt editor. Uncanny Automator will display a list of available tokens, such as the post title, author name, publication date, and more.
Once everything is set, click ‘Save’ to store the action. Your recipe now has a trigger and a first action that generates concise, AI-powered summaries whenever a new post is published.
Step 6: Add the Google Sheets Action to Store Summaries
Now it’s time to add the second action to your workflow. This action will automatically create a row in your chosen Google Sheet and add the summary generated by OpenAI.
This is what makes the workflow truly useful because all your post summaries will be automatically stored and organized.
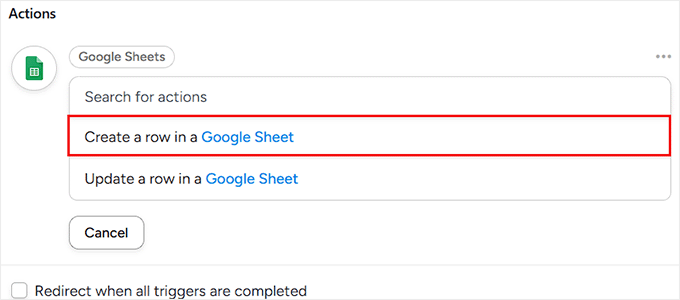
To add this action, click the ‘Add Action’ button again in your recipe. Select Google Sheets as the integration this time.
Uncanny Automator will then show a list of actions it can perform. For this workflow, choose ‘Create a row in a Google Sheet’.
This tells Automator to add a new row to your spreadsheet whenever OpenAI generates a summary for a new blog post.
Next, you’ll see a dropdown to select the Google Spreadsheet you connected earlier. Choose the spreadsheet where you want to store your blog post summaries.
Then, select the worksheet (tab) inside that spreadsheet.
If your file only has one sheet, you don’t need to worry. But if your spreadsheet has multiple tabs, make sure you select the correct one so your data doesn’t end up in the wrong place.
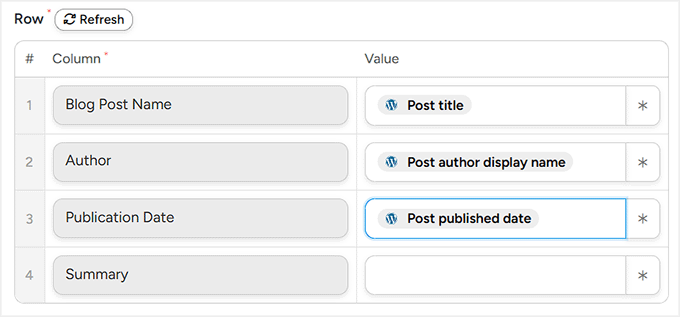
After that, scroll down to the ‘Rows’ section. This is where you map your blog post data to the columns in your Google Sheet.
Don’t worry, because mapping is simpler than it sounds. You’re just matching each column in your spreadsheet with the right piece of information from your post or the OpenAI summary.
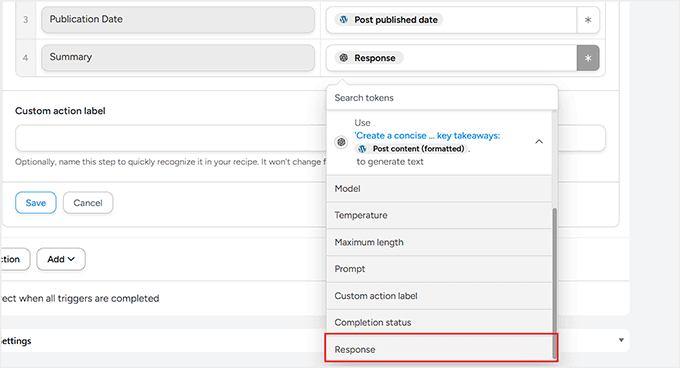
To start mapping, click the asterisk (*) icon next to a field. This opens a list of available data that Automator can pull from the trigger (your blog post) and the OpenAI action.
Under the Triggers section, you’ll see options like post title, author name, published date, and more.
Under the Actions section, you’ll find ‘OpenAI Response’, which is the summary generated by AI.
Make sure to select ‘Response’ for the summary column in your sheet. This ensures the summary is automatically added to the correct column.
Take your time mapping each column carefully.
Once you’ve matched all the fields, click ‘Save’ to store your settings.
Step 7: Save and Activate Your Recipe
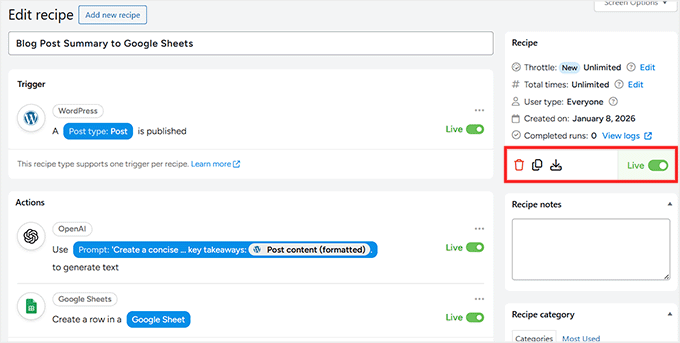
Now that both your trigger (a new post published) and your actions (generating a summary with OpenAI and adding it to Google Sheets) are set up, it’s time to make your recipe live.
Before activating, take a moment to double-check all your mappings. Make sure the columns in Google Sheets match the blog post information, and that the OpenAI summary is mapped to the correct column.
This ensures that every new post is added correctly without errors.
Once you’re confident everything is correct, toggle the Trigger and Action switches to ‘Live. Then, in the right-hand column, change the recipe status from ‘Draft’ to ‘Live’.
And that’s it! Your automation is now active.
To test it, simply go to Posts » Add New and publish a blog post (or update an existing one if you set the trigger to update).
Give it a few seconds, then check your Google Sheet. You should see a new row appear automatically with your AI-generated summary.
Next Steps for Building Make.com-Style Workflows Right in WordPress
Overall, after creating workflows with both Make.com and Uncanny Automator, I can confidently say that building complex automations with Uncanny Automator is so much easier.
Other than the blog post summary workflow I showed above, you can also create workflows like these, and they’re much simpler to set up in Uncanny Automator compared to Make.com:
Native WordPress events trigger actions, with no external scheduler
Multiple modules, time delays, and extra setup per platform
Once your first workflow is live, you can confidently explore and create new automations that save time, streamline processes, and make your WordPress site smarter.
Frequently Asked Questions About Uncanny Automator vs. Make.com
Now that you’ve seen how Uncanny Automator can simplify Make.com-style workflows in WordPress, you probably have a few questions.
To make things easier, I’ve answered some of the most common questions about AI, automation, and how these tools work together:
Can Uncanny Automator handle complex workflows like Make.com?
Yes! For workflows that mostly involve WordPress and its plugins, Uncanny Automator can handle them just like Make.com—but without the extra setup, APIs, or webhooks.
Do I need coding skills to use Uncanny Automator?
No coding is required. The visual Recipe builder and tokens make creating automations as simple as point-and-click.
What’s the difference between the Free and Pro versions of Uncanny Automator?
The Free version gives you unlimited recipes with all the basic triggers and actions you need to get started.
The Pro version steps it up with conditional logic, loops, scheduled automations, over 150 integrations, and even multisite support—basically everything you need for more advanced workflows.
Will using Uncanny Automator slow down my WordPress site?
Not significantly. Automator runs actions asynchronously, so site performance is minimally affected—mostly limited by your server resources.
Will Uncanny Automator summarize my existing blog posts?
By default, this recipe only runs when a new post is published. It will not go back and summarize your old posts automatically. However, Uncanny Automator Pro includes a feature to run recipes on existing content if you need to bulk-update your site.
Can I migrate my existing Make.com workflows to Uncanny Automator?
There’s no one-click migration. You’ll need to manually rebuild workflows: Router → Condition, Iterator → Loop, HTTP → Webhook. But once set up, Uncanny Automator’s WordPress-native integration makes maintenance much easier.
Additional Resources to Take Your Automations to the Next Level
If you’re ready to get even more out of Uncanny Automator, there’s a ton you can explore.
From advanced workflows to AI-powered automations, here are some articles to help you out:


Leave a Reply